On occasion you may have a file that you want to open and use but you want to be sure you don’t accidentally save any changes. Maybe it is the final version of a report created in Word or a budget created in Excel.
In my case, I have a sign-in sheet I use for my one-day courses. I usually open the blank form, fill in the date, course name and attendee names then print the form and close without saving changes. Sometimes in an absentminded moment, I click on Save through force of habit. Not a huge deal as I can delete the data and save a blank version again but it’s a nuisance.
To prevent a file being accidentally updated, you can make it Read-only. If you click on Save when you are using a Read-only file, the Save As dialog box opens. Many applications have a way to make a file Read-only but here is a universal solution, courtesy of the Windows operation system.
First find the file you want to mark Read-only. You can use File Explorer, My Computer or the Open or Save As dialog box of your favourite Office program.
To mark a file Read-only:
- Locate the file and Right-click on it
- Select Properties
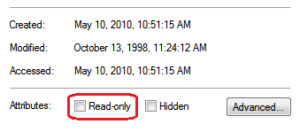
- Click on the Read-only check box at the bottom of the dialog box
- Click on OK
Now when you open the file, the Title Bar at the top of the window will say (Read-only). Read-only prevents you from updating the file on disk. You can still open the file and edit it but if you want to save the changes you need to create a new file.
To make the file updatable again, simply repeat the above steps and clear the Read-only check box.